1. December 2015
Niranjan Singh
.NET
Windows 8 and 10 comes with .NET framework 4 or higher pre-installed, but there are lots of applications require the .NET framework v3.5 installed to install on these newer version of operating systems. These applications will not run unless you will install the required version of .NET framework. When you try to run any such sort of applications then Windows 8 and 10 will prompt you to download and install .NET framework 3.5 from the Internet. However, this will take a lot of time.
Source: MSDN article.
Below are the steps to enable .NET framework 3.5:
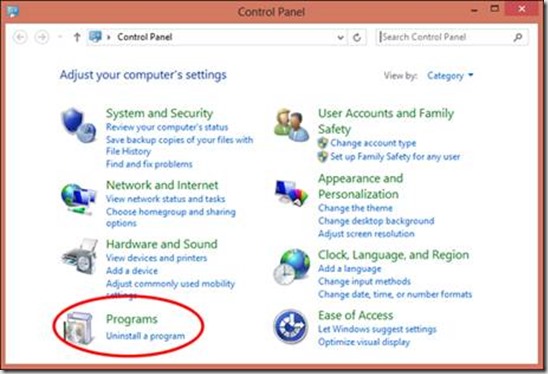
- Go to Settings. Choose Control Panel then choose Programs.
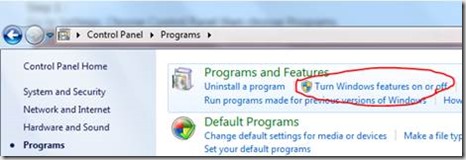
- Click Turn Windows features on or off, and the user will see window as image below.
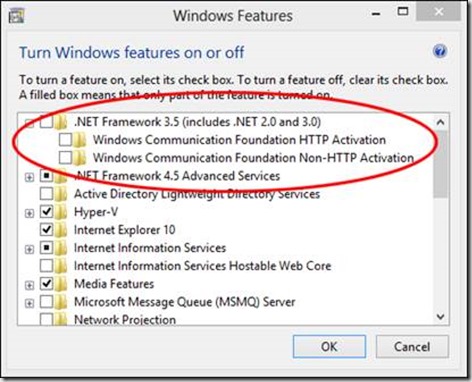
You can enable this feature by click on .NET Framework 3.5 (include .NET 2.0 and 3.0) select it and click OK. After this step, it will download the entire package from internet and install the .NET Framework 3.5 feature.
You can save your time and install .NET Framework 3.5 from the Windows 8 and 10 installation media respectively. This method is much faster and does not even require an Internet connection.
Follow below steps to install .NET Framework 3.5 in Windows 8 and 10 using DISM:
- Bring your installation media to prepare installation either it is DVD or ISO image. If you are using ISO image then mount it using software e.g. Power ISO, DAEMON Tools so then you will be able to access the files for the installation.
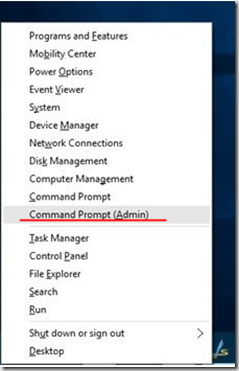
Packages are located in the drive letter: \sources\sxs directory. - Open CMD.EXE with Administrative Privileges. Right click on the start button (or press “Win + X”) to popup the system menu. There you will find a menu item titled “Command Prompt (Admin)”. Click on this to launch the command prompt in admin mode.
- Run the following command and hit Enter.
Dism.exe /online /enable-feature /featurename:NetFX3 /All /Source:E:\sources\sxs /LimitAccess
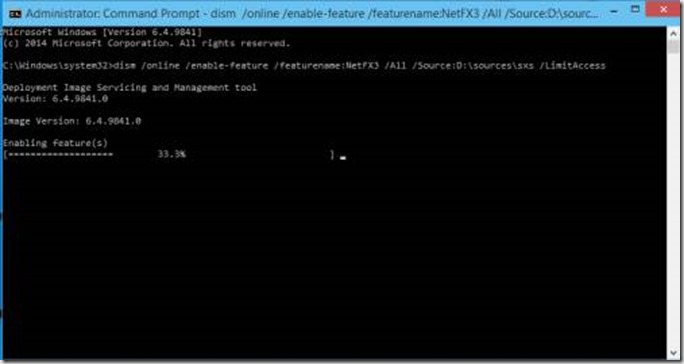
Please make sure to change the source path:
e.g.
If you have Windows setup at “D:” drive, replace “E:” with “d:”
If you have Windows setup at “F:\Win10Setup” folder path, replace “x:” with “f:\Win10Setup”
When run from the command prompt, it will start installing the .NET framework. It will take a while to complete the whole process. Once done, restart your system for the changes to take effect.
Details on command line parameters of DISM:
- /Online targets the operating system you're running (instead of an offline Windows image).
- /Enable-Feature /FeatureName:NetFx3 specifies that you want to enable the .NET Framework 3.5.
- /All enables all parent features of the .NET Framework 3.5.
- /LimitAccess prevents DISM from contacting Windows Update.
- /Source specifies the location of the files needed to restore the feature (in this example, the x:\sources\sxs directory).
After completion of this process .NET Framework 3.5 feature enabled. Restart and then you good to go for the installation of your application.