What is Docker?
From Wikipedia:
Docker is a computer program that performs operating-system-level virtualization, also known as "containerization". It was first released in 2013 and is developed by Docker, Inc.
Docker is used to run software packages called "containers". Containers are isolated from each other and bundle their own application, tools, libraries and configuration files; they can communicate with each other through well-defined channels.
All containers are run by a single operating system kernel and are thus more lightweight than virtual machines. Containers are created from "images" that specify their precise contents. Images are often created by combining and modifying standard images downloaded from public repositories.
Unification of container technology
- A set of command-line tools to work with containers
- A unified way to build Container images
- A unified way of maintaining images in a registry
- A daemon process that manages the images & networking on a host machine
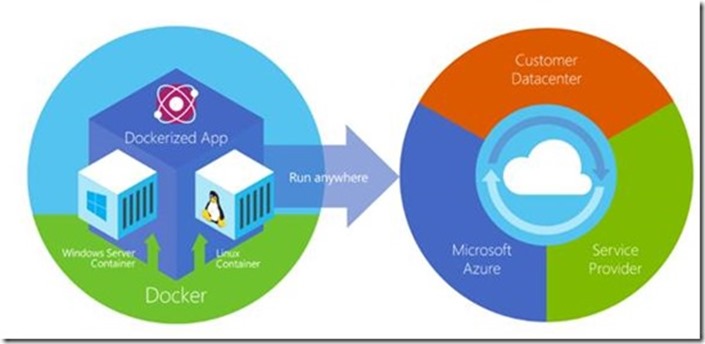
from: Microsoft doc
What Is a Container?
A container is an isolated, resource controlled, and portable operating environment. A container provides a place where an application can run without affecting the rest of the system and without the system affecting the application.
If you were inside a container, it looks very much like you are inside a freshly installed physical computer or a virtual machine.
Containers are compared to virtual machines, but they are completely different technology.
Below are the benefits of containers over Virtual machines:
- Containers provide the isolation of a virtual machine with the lightweight process. Container provides almost the same level of isolation as you see in a virtual machine but is very lightweight in terms of overhead and start-up time.
- You can see inside a container and also make changes to it but in case of Virtual machines you have to first start the VM to the Virtual machine architecture and data. You can even make changes in your container, and then the isolation will ensure that nobody else but you can see the changes that you've made.
- The container will enable you to fully utilize the host machine resources e.g. CPU, memory, disk, and networking.
- Containers does not pre-allocate any resources. It is very light weight comparable to a process. If you run multiple containers on the same host machine, then these are fully isolated from each other and the host.
Containers vs. Virtual Machines
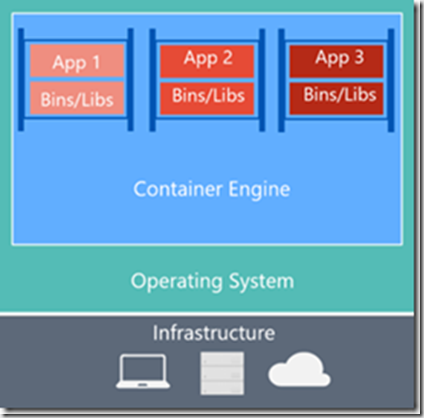
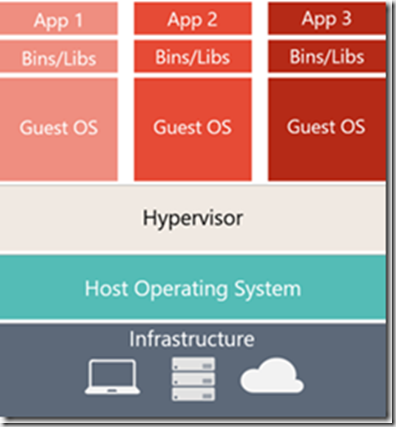
At first look containers and Virtual machines look similar because both uses the hardware and the host operating system. You can run applications on the host operating system, and we can have virtual machines and Containers on the host as well.
Virtual machine has its own operating system and separate application on it. On another hand still have the hardware and, of course, the host operating system interact with the kernel which is responsible for interacting with the hardware handling scheduling of different processes and managing resources like virtual management and CPU cycles.
Containers let us to run our application by sharing the operating system kernel. This kernel has edit capabilities to create isolation between the different containers and never share anything else between the containers. Although Virtual machine provide isolation but using Hypervisor. Virtual machine has its own operating system and applications.
Setting up the Virtual machine operating system and application is a long task but setting up the containers using the images is a faster process. It just requires an image and configure your application on container using these predefined container images.
Container provide faster bootup time rather than the virtual machine. They are up and running within few seconds.
Containers | Virtual Machines |
| 
|
Source: Run Windows Containers
Containerise a .NET application
To create custom image for your application, we require docker tools. In this article, you will know that how to push your containerized application to the docker repository and to Azure App Service.
You can also deploy your application’s container from Visual Studio to Azure Container Registry, and then run it in App Service.
Now it is time to start creating a container image for ASP.NET MVC application using the windows containers.
Prerequisites
To create a .NET application container image, we require below prerequisites tools:
o Install the latest updates in Visual Studio by clicking Help > Check for Updates.
o Add the workloads in Visual Studio by clicking Tools > Get Tools and Features
Note: In this article, Visual Studio 2019 Preview is used to create to the ASP.NET MVC application.
Create/Open an ASP.NET web app
In Visual Studio, create a ASP.NET MVC project by selecting File > New > Project.
In the New Project dialog, select the template Visual C# > Web > ASP.NET Web Application (.NET Framework).
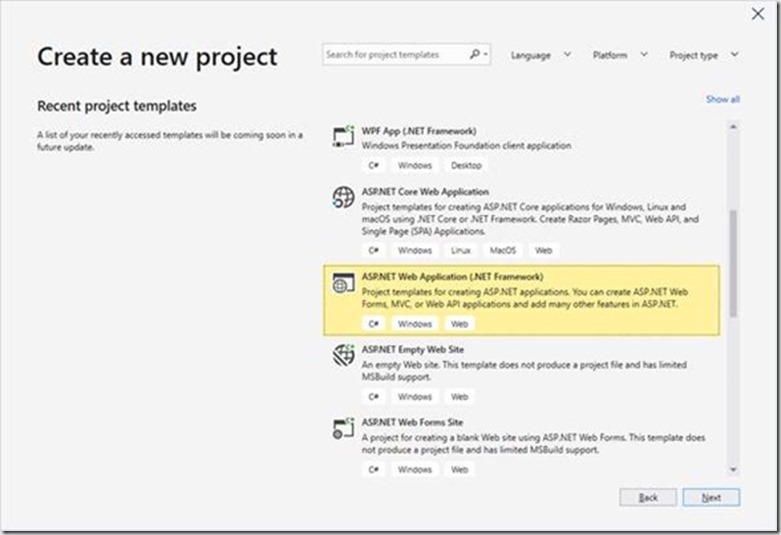
Define the solution and the project name then press create.
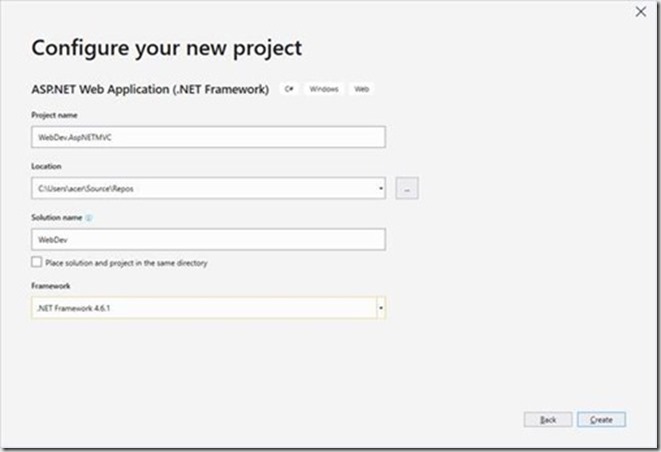
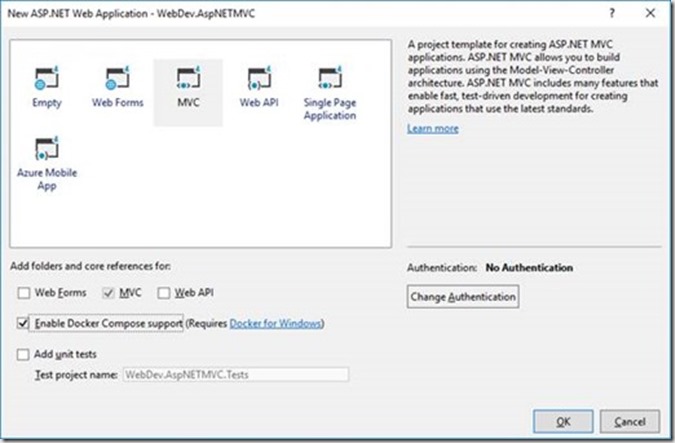
select the MVC template and do not forgot to select Enable Docker Compose support.
Select OK to continue.
Once the project is setup then you will find Dockerfile under the project. It defines the structure of the container and which base image will be used to host your application.
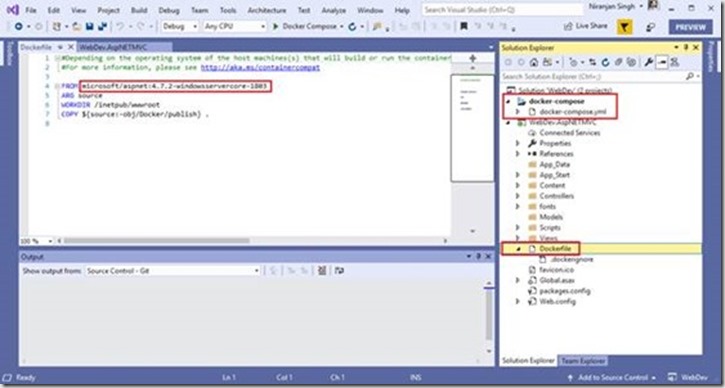
Update the docker file with Azure App Server supported base image so the update docker file would be as below:
FROM microsoft/aspnet:4.7.1
ARG source
WORKDIR /inetpub/wwwroot
COPY ${source:-obj/Docker/publish} .
Here is the list of supported base image.
Create and Publish to Docker Hub
In the Solution Explorer, right-click the created project and select Publish.
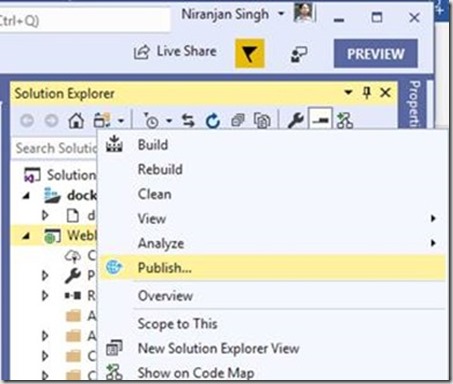
Select Container Registry > Docker Hub > Publish. There is another option also available. You can directly publish this application to Azure App Server or Azure Container registry. Although, we took the publish path from docker registry to Azure App service.
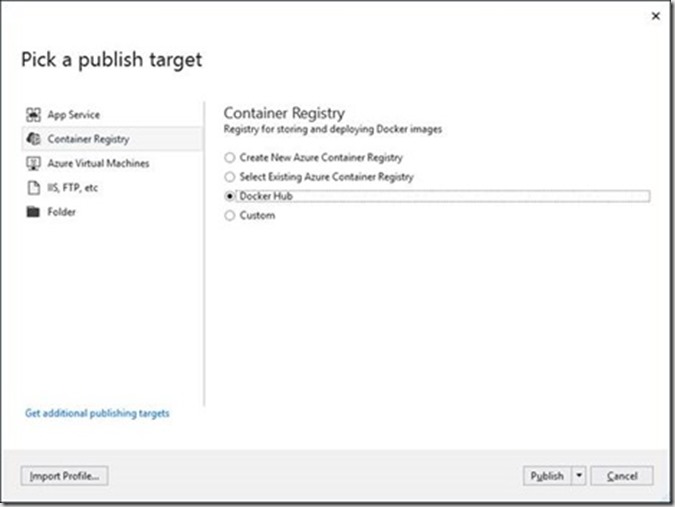
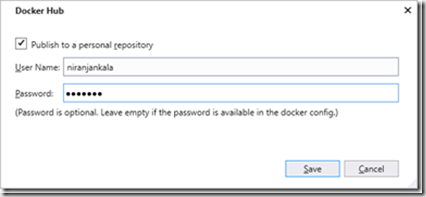
Enter your docker credentials:
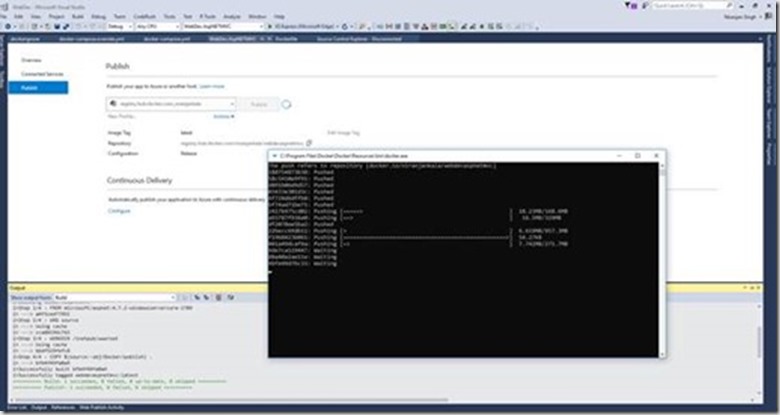
Now publish process create the docker image using the base image and bundle your application in to the image.
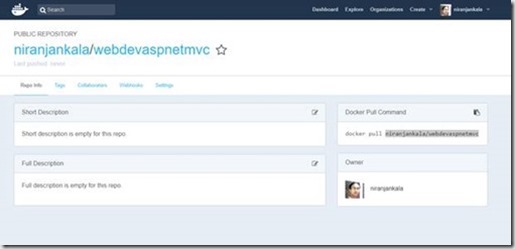
When process complete you will be able to see the pushed docker image in the docker registry at docker hub.
Now setup the Azure Container service to use this docker image.
Create a Windows container app
Sign in to the Azure portal at https://portal.azure.com with your account.
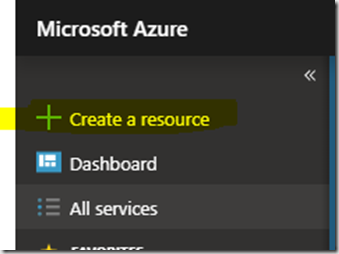
- Choose Create a resource in the upper left-hand corner of the Azure portal.
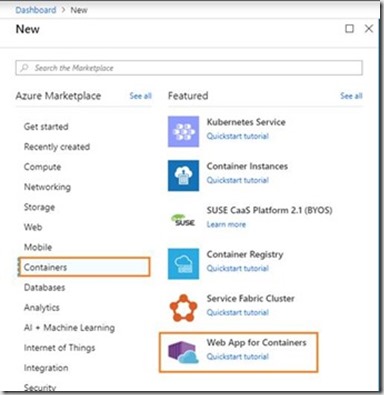
- In the search box above the list of Azure Marketplace resources, search Containers and then select Web App for Containers.
- Provide an app name and let the default option create a new resource group selected, and click Windows in the OS box.
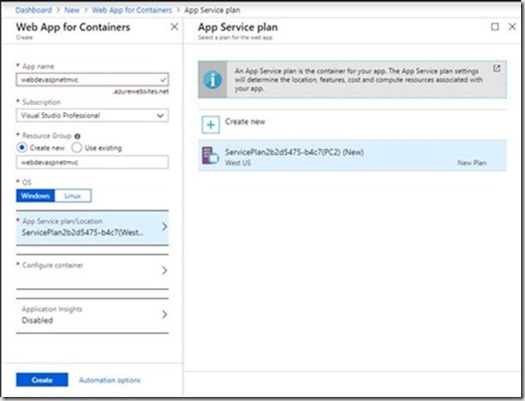
- By default, wizard Create an App Service plan but you can create your custom by clicking App Service plan/Location > Create new. Give the new plan a name, accept the defaults, and click OK.
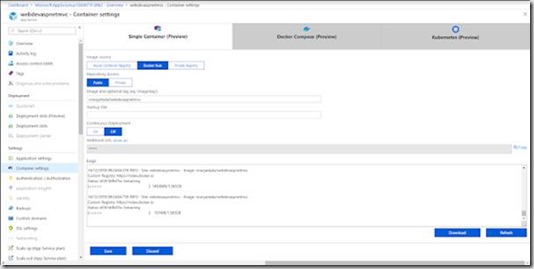
- Now you will configure the container and provide the detail of the create docker image in the step. Click Configure container. In Image and optional tag, use the repository name you created in Publish to Docker Hub step, then click OK. In previous step I have create repository with name “niranjankala\webdevaspnetmvc” as you can see in above docker hub image.
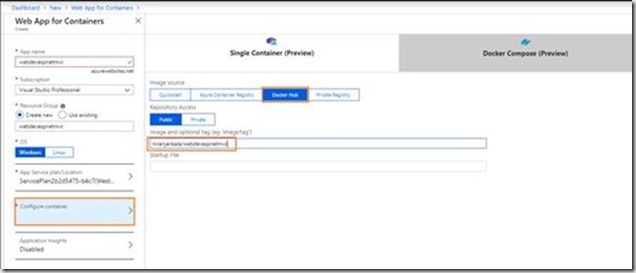
There is an option for the Kubernetes but Kubernetes is only supported on Linux operating system-based applications. - Click Create and wait for Azure to create the required resources.
Once the deployment complete you are ready to browse your containerized application. Now browse “webdevaspnetmvc.azuresites.net” or whatever application name you chosen during the web app service setup process.
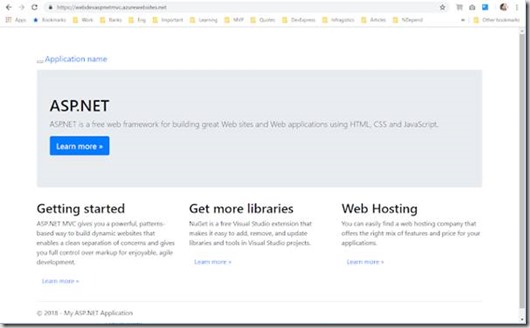
Now your containerized application is up and running.