Introduction
The Azure Speech Translation service enables real-time, multi-language speech-to-speech and speech-to-text translation of audio streams. In this article, you will learn how to run an application to translate speech from one language to text in another language using Azure’s powerful tools.
Objective
By the end of this article, you will be able to create and deploy an application that translates speech from one language to text in another language.
Step 1: Creating a New Azure Cognitive Services Resource Using Azure Portal
Task 1: Create Azure Cognitive Speech Service Resource
-
Open a tab in your browser and go to the Speech Services page. If prompted, sign in with your Azure credentials.
-
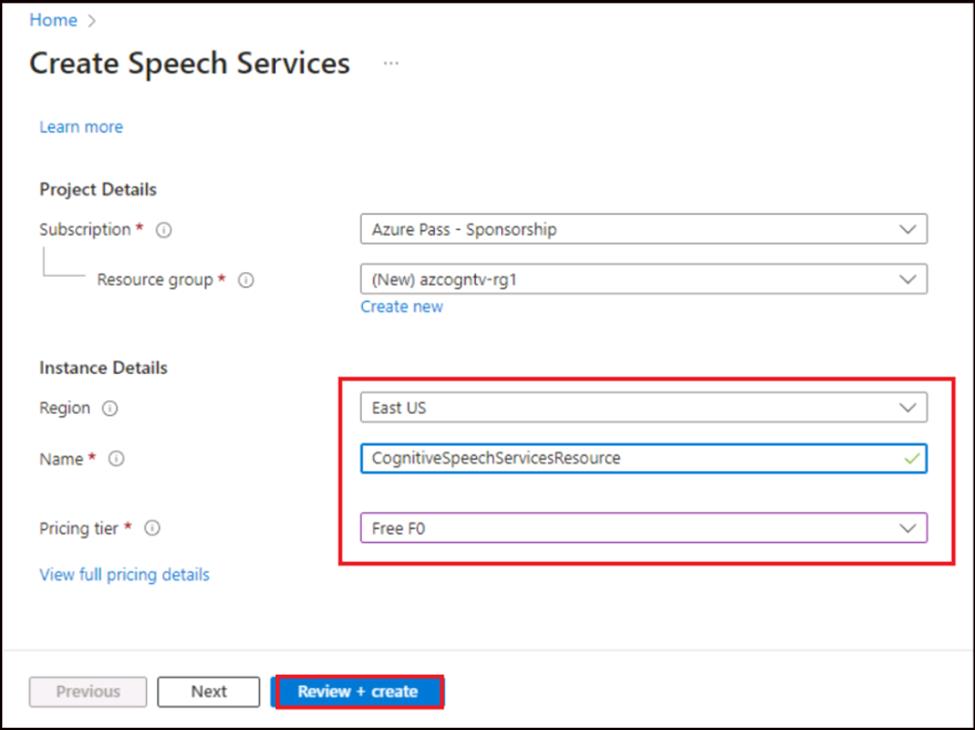
On the Create page, provide the following information and click on Review + create:
- Subscription: Select your subscription (this will be selected by default).
- Resource group: Create a new group named
azcogntv-rg1. Click on OK.
- Region: East US
- Name: CognitiveSpeechServicesResource
- Pricing tier: Free F0

-
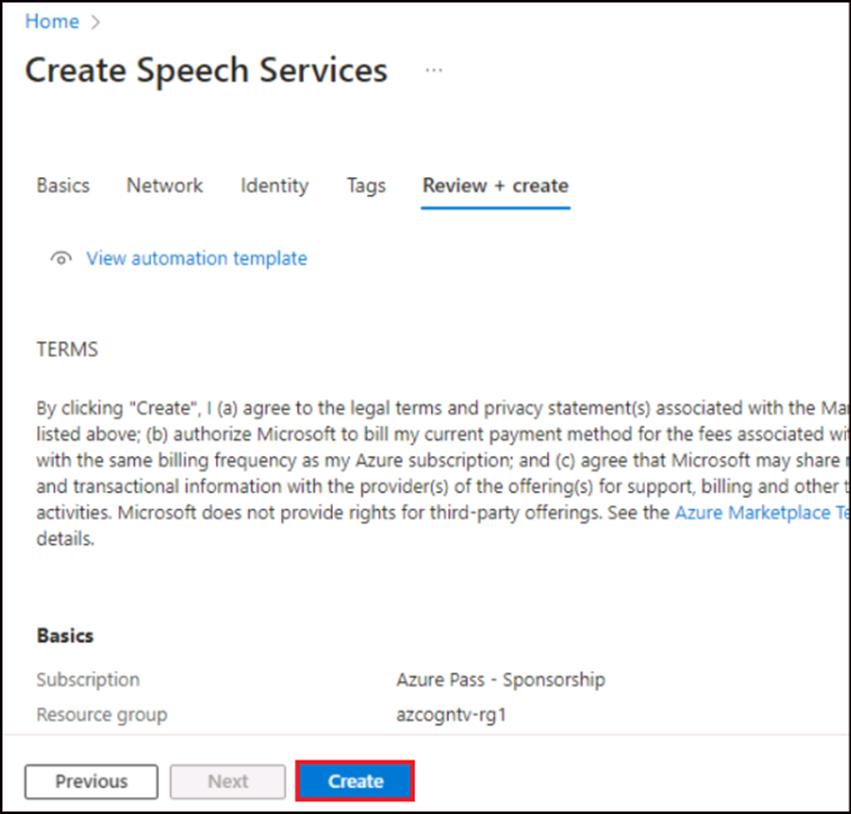
Once the validation passes, click on Create.
-
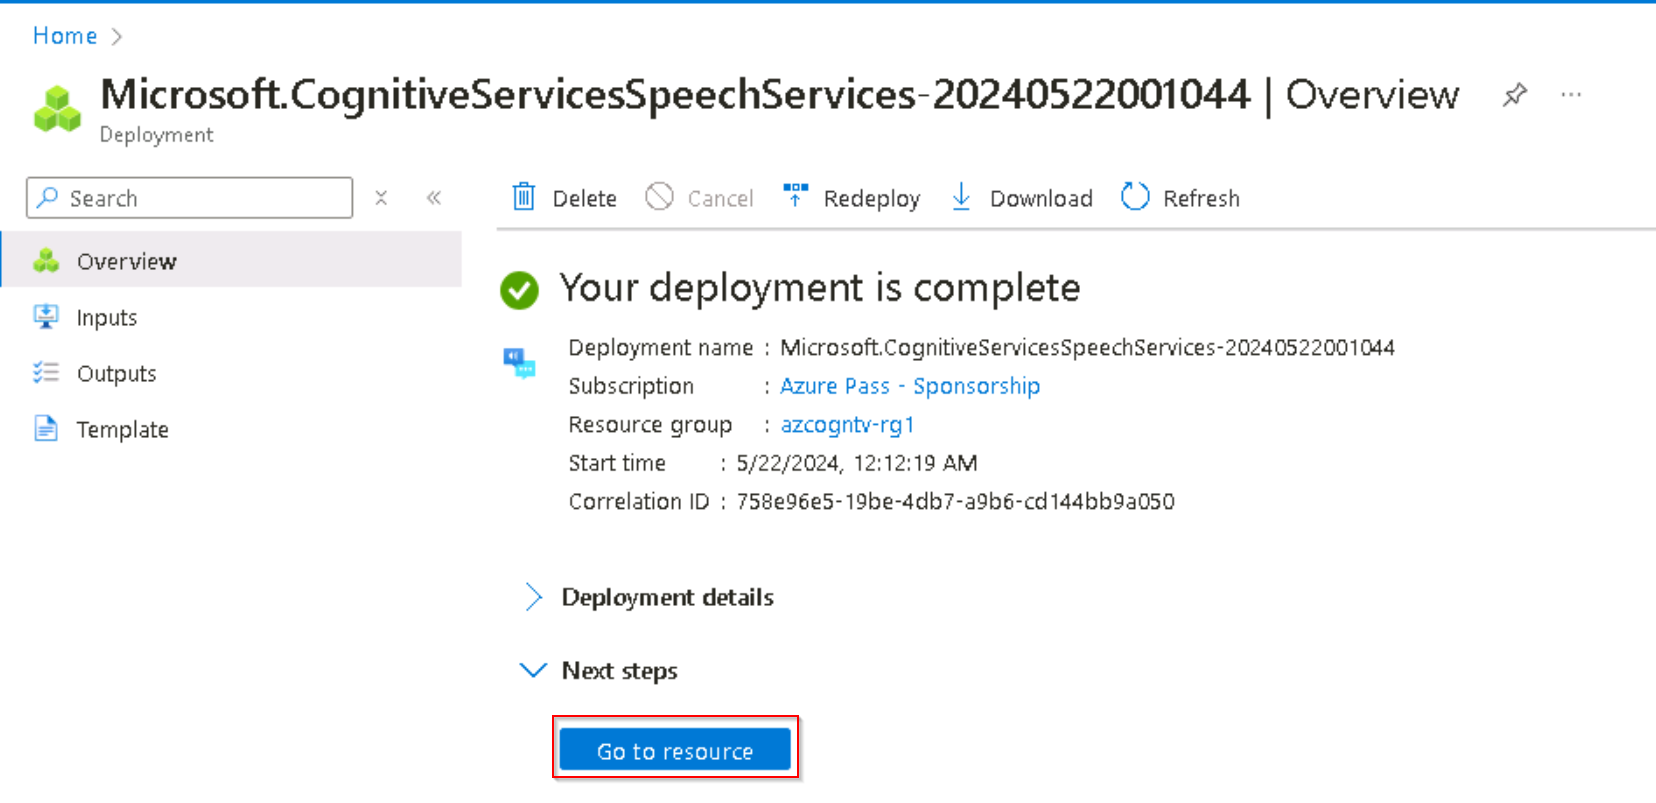
Wait for the deployment to complete, then click on Go to resource.
-
Click on Keys and Endpoint from the left navigation menu. Copy and save Key 1 and Endpoint values in a notepad for later use.

Task 2: Create Azure Cognitive Language Service Resource
-
Open a new browser tab and go to the Language Services page. Sign in with your Azure credentials.
-
Without selecting any option on the page, click on Continue to create your resource.

-
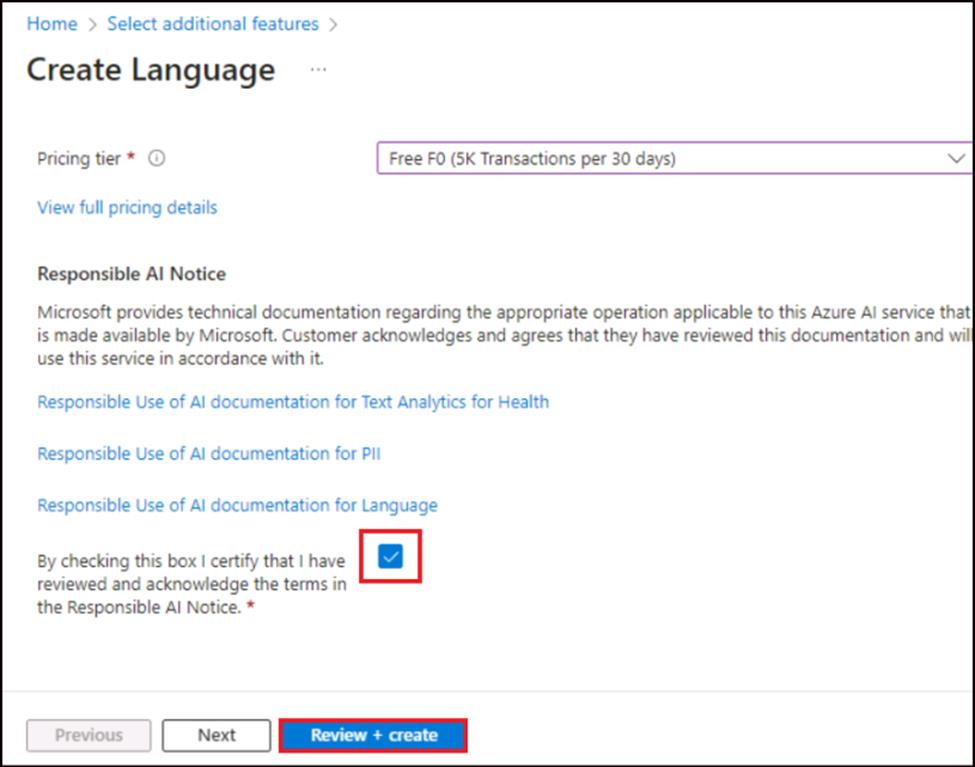
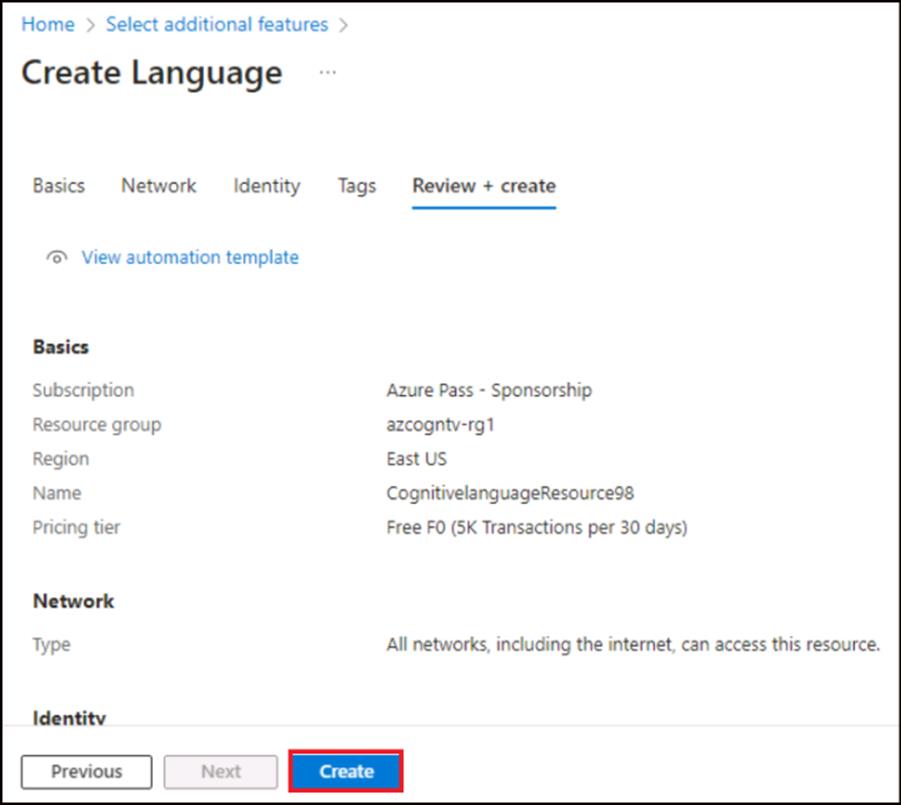
Update with the following details and then click on Review + Create:
- Subscription: Your Azure subscription
- Resource Group: Select
azcogntv-rg1
- Region: East US
- Name: CognitivelanguageResourceXX (Replace XX with any random number)
- Pricing tier: Free (F0)
- Select checkbox: By checking this box, I certify that I have reviewed and acknowledged the Responsible AI Notice terms.

-
Review the resource details and then click on Create.
-
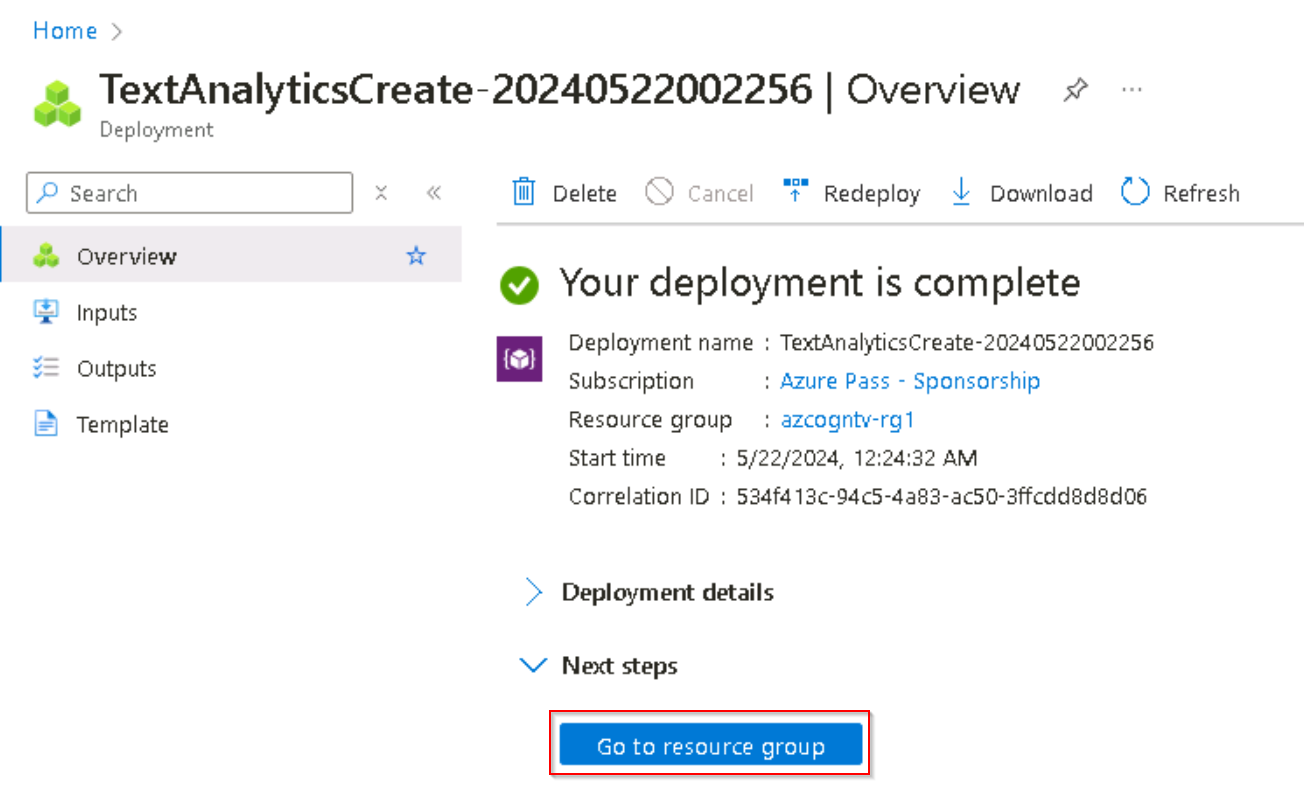
Wait for the deployment to complete, and once successful, click on Go to resource group.
-
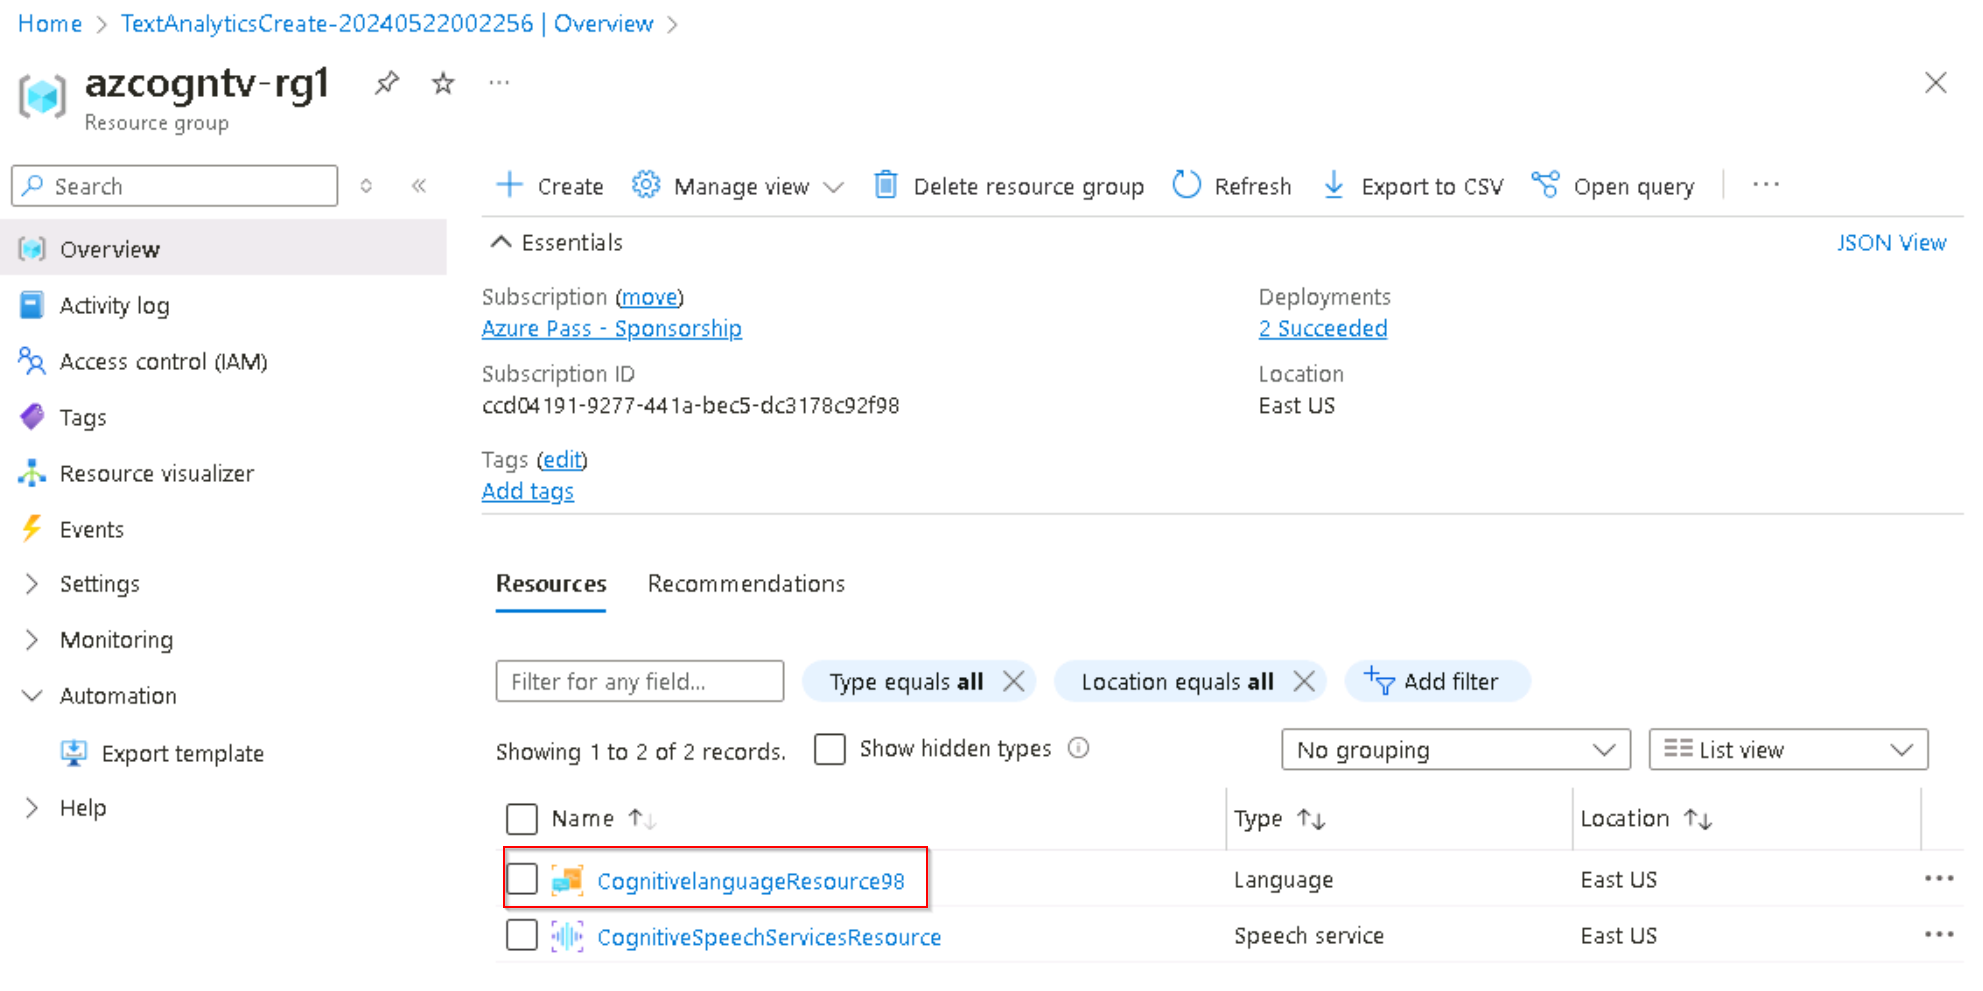
Click on CognitiveLanguageResource.
-
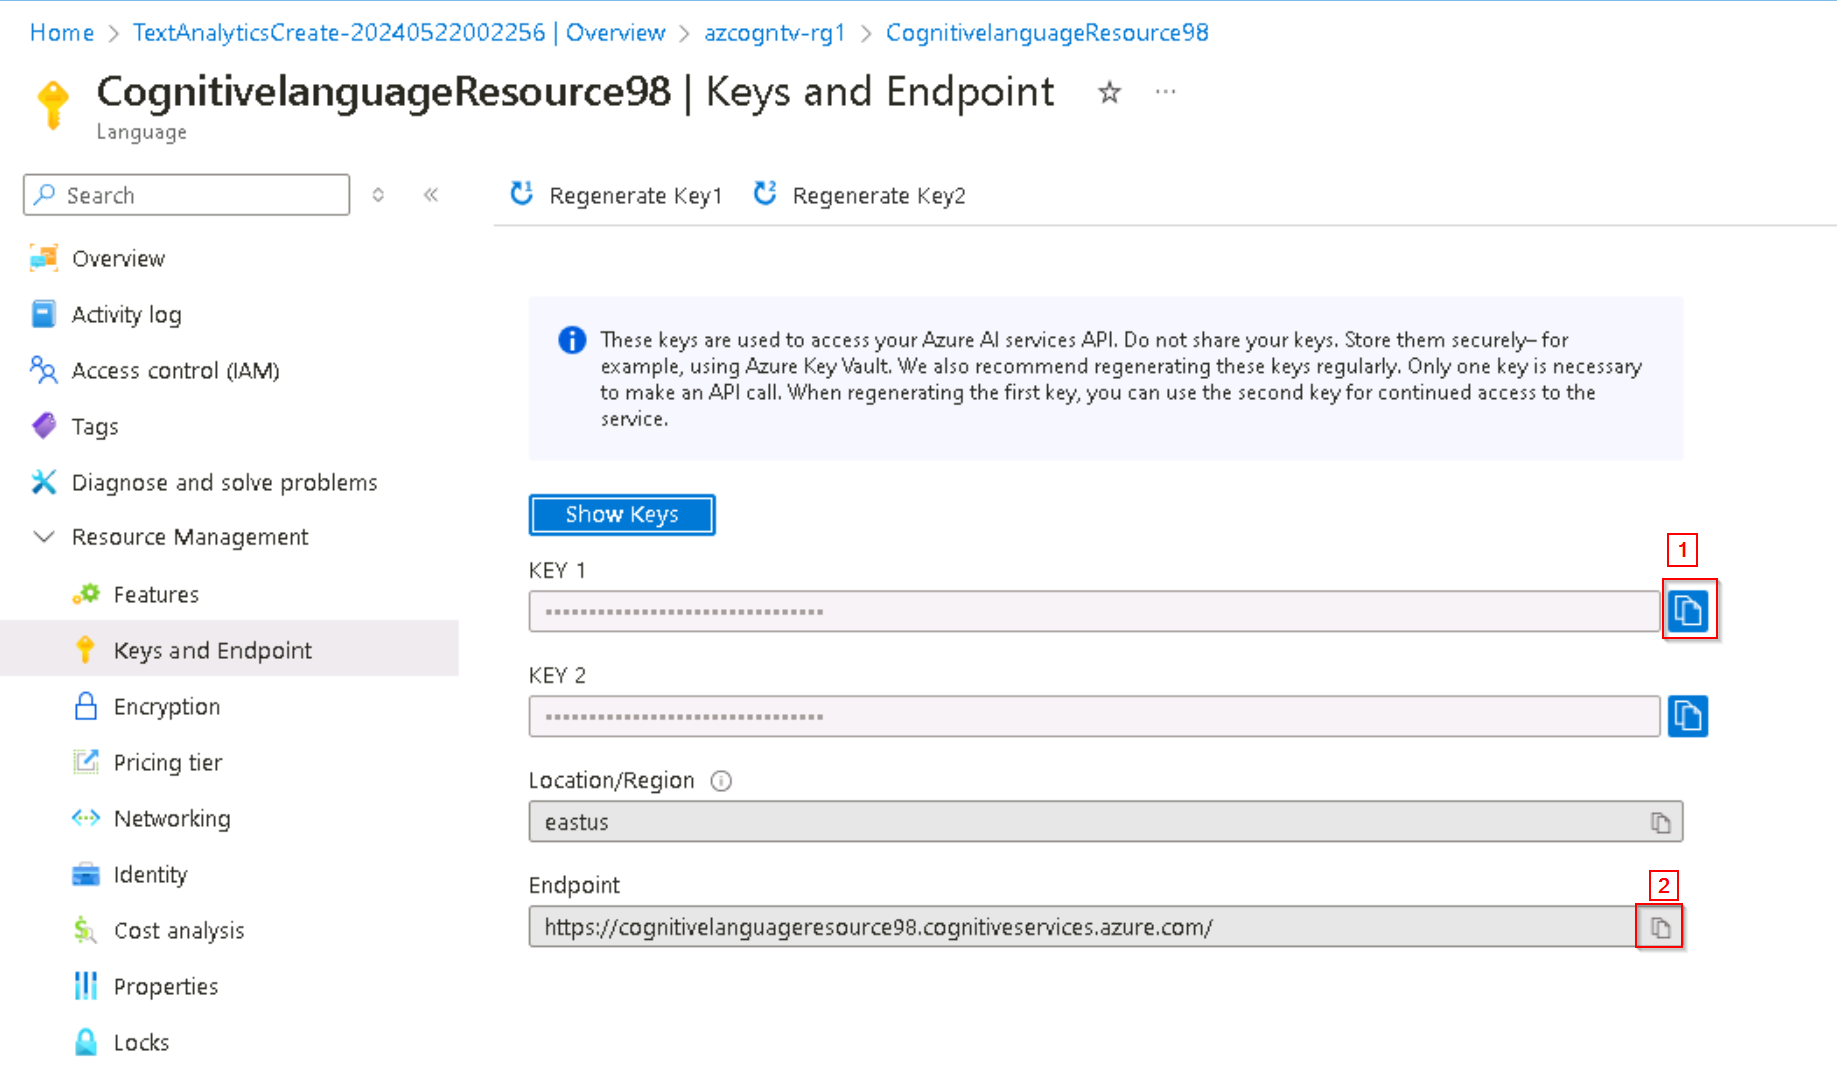
Click on Keys and Endpoints > Show keys. Copy Key 1 and endpoint values and save them in a notepad for later use.
Step 2: Recognizing and Translating Speech to Text
Task 1: Set Environment Variables
Your application must be authenticated to access Cognitive Services resources. Use environment variables to store your credentials securely.
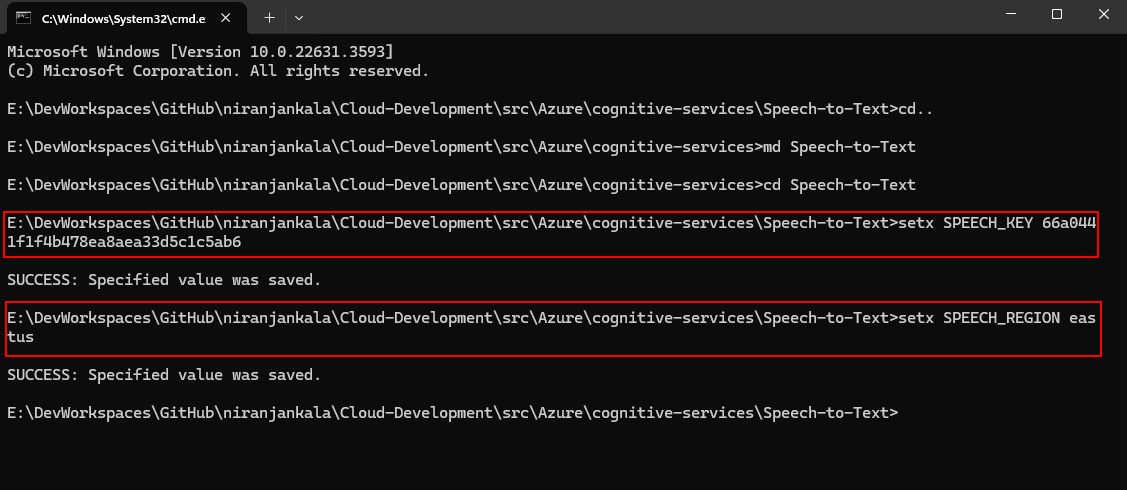
-
Open Command Prompt and run mkdir Speech-to-Text to create a directory. Then run cd Speech-to-Text to navigate into it.
mkdir Speech-to-Text
cd Speech-to-Text
-
To set the SPEECH_KEY environment variable, replace your-key with one of the keys for your resource saved earlier.
setx SPEECH_KEY your-key
setx SPEECH_REGION eastus
-
After adding the environment variables, restart any running programs that need to read the environment variable, including the console window. Close the Command Prompt and open it again.
Task 2: Translate Speech from a Microphone
-
Open Command Prompt, navigate to your directory (cd Speech-to-Text), and create a console application with the .NET CLI.

-
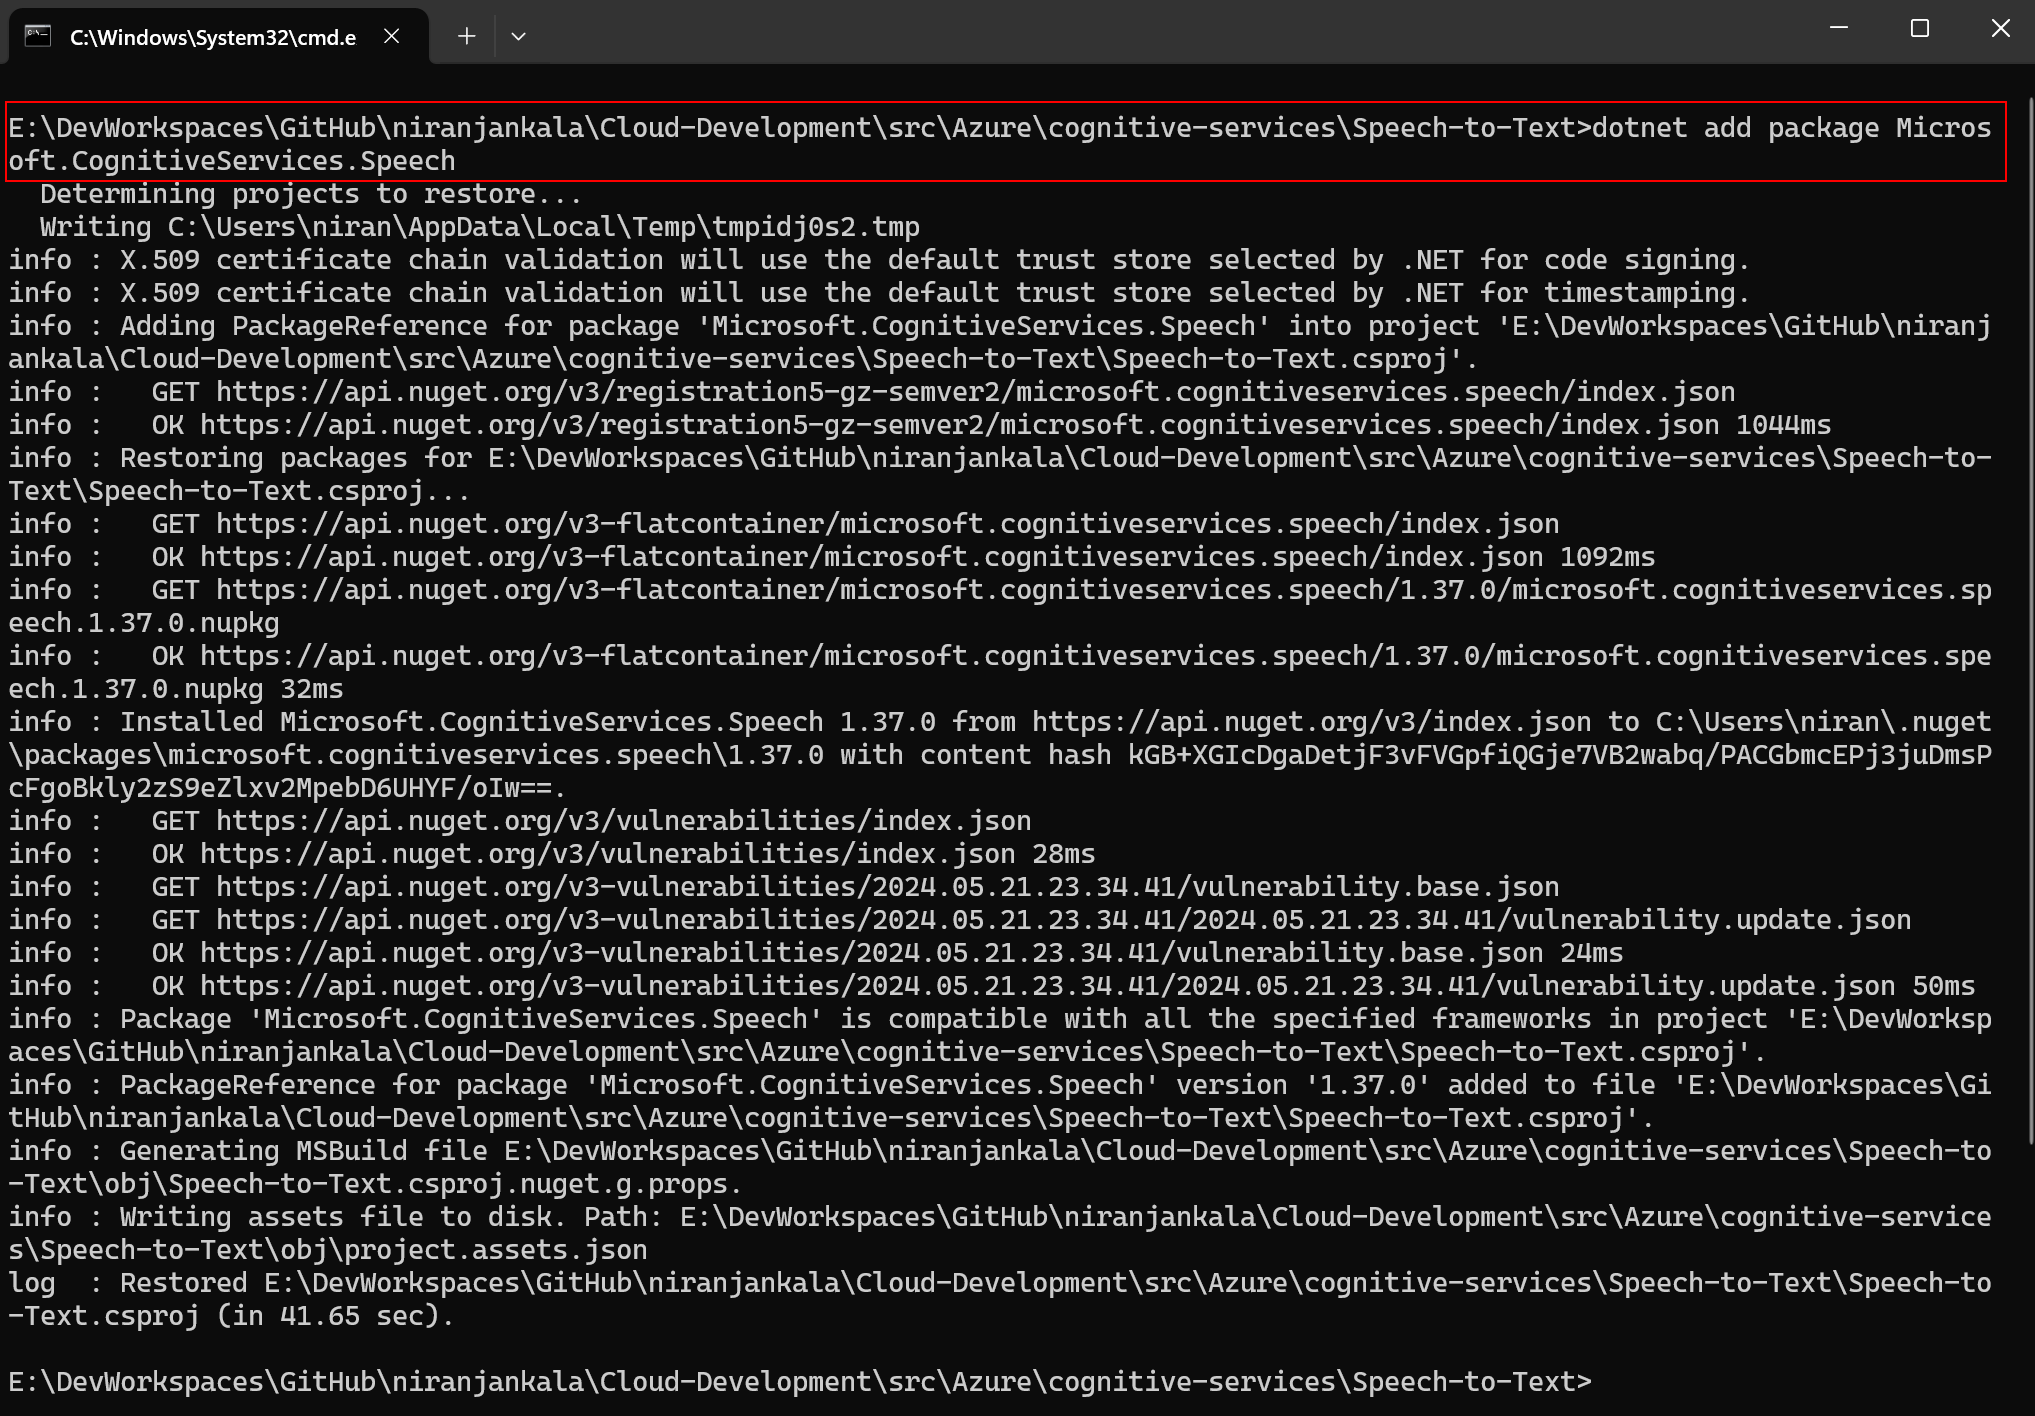
Install the Speech SDK in your new project with the .NET CLI.
dotnet add package Microsoft.CognitiveServices.Speech
-
Open the Program.cs file in Notepad from the Speech-to-Text project folder. Replace the contents of Program.cs with the following code:
using System;
using System.IO;
using System.Threading.Tasks;
using Microsoft.CognitiveServices.Speech;
using Microsoft.CognitiveServices.Speech.Audio;
using Microsoft.CognitiveServices.Speech.Translation;

class Program
{
    // This example requires environment variables named "SPEECH_KEY" and "SPEECH_REGION"
    static string speechKey = Environment.GetEnvironmentVariable("SPEECH_KEY");
    static string speechRegion = Environment.GetEnvironmentVariable("SPEECH_REGION");

    static void OutputSpeechRecognitionResult(TranslationRecognitionResult translationRecognitionResult)
    {
        switch (translationRecognitionResult.Reason)
        {
            case ResultReason.TranslatedSpeech:
                Console.WriteLine($"RECOGNIZED: Text={translationRecognitionResult.Text}");
                foreach (var element in translationRecognitionResult.Translations)
                {
                    Console.WriteLine($"TRANSLATED into '{element.Key}': {element.Value}");
                }
                break;
            case ResultReason.NoMatch:
                Console.WriteLine($"NOMATCH: Speech could not be recognized.");
                break;
            case ResultReason.Canceled:
                var cancellation = CancellationDetails.FromResult(translationRecognitionResult);
                Console.WriteLine($"CANCELED: Reason={cancellation.Reason}");

                if (cancellation.Reason == CancellationReason.Error)
                {
                    Console.WriteLine($"CANCELED: ErrorCode={cancellation.ErrorCode}");
                    Console.WriteLine($"CANCELED: ErrorDetails={cancellation.ErrorDetails}");
                    Console.WriteLine($"CANCELED: Did you set the speech resource key and region values?");
                }
                break;
        }
    }

    async static Task Main(string[] args)
    {
        var speechTranslationConfig = SpeechTranslationConfig.FromSubscription(speechKey, speechRegion);
        speechTranslationConfig.SpeechRecognitionLanguage = "en-US";
        speechTranslationConfig.AddTargetLanguage("it");

        using var audioConfig = AudioConfig.FromDefaultMicrophoneInput();
        using var translationRecognizer = new TranslationRecognizer(speechTranslationConfig, audioConfig);

        Console.WriteLine("Speak into your microphone.");
        var translationRecognitionResult = await translationRecognizer.RecognizeOnceAsync();
        OutputSpeechRecognitionResult(translationRecognitionResult);
    }
}
-
Run your new console application to start speech recognition from a microphone:
-
Speak into your microphone when prompted. What you speak should be output as translated text in the target language:
Speak this: The Speech service provides speech-to-text and text-to-speech capabilities with an Azure Speech resource and then press Enter.

Conclusion
In this article, you translated speech from a microphone to a different language by updating the code in the Program.cs file. This powerful feature of Azure Cognitive Services allows for seamless and real-time translation, making it a valuable tool for various applications and industries.
Source Code