Introduction
In this article, you will know that how to enable docker support for ASP.NET application in Visual Studio. We will create an ASP.NET Core application docker support and also enable docker support in an existing application.
Prerequisites
- Docker for Windows
- Visual Studio 2017 or later with the .NET Core cross-platform development workload
Enable Docker support in a new application
You can get Docker support in your project when you create a Visual Studio web project, either. NET Core or the full framework. If you choose the .NET Core framework, you get the option to add Docker support in the new project wizard but for the full framework, we can add Docker support later context menu “Solution Explorer”. See below steps to create a .NET Core project with Linux container support:
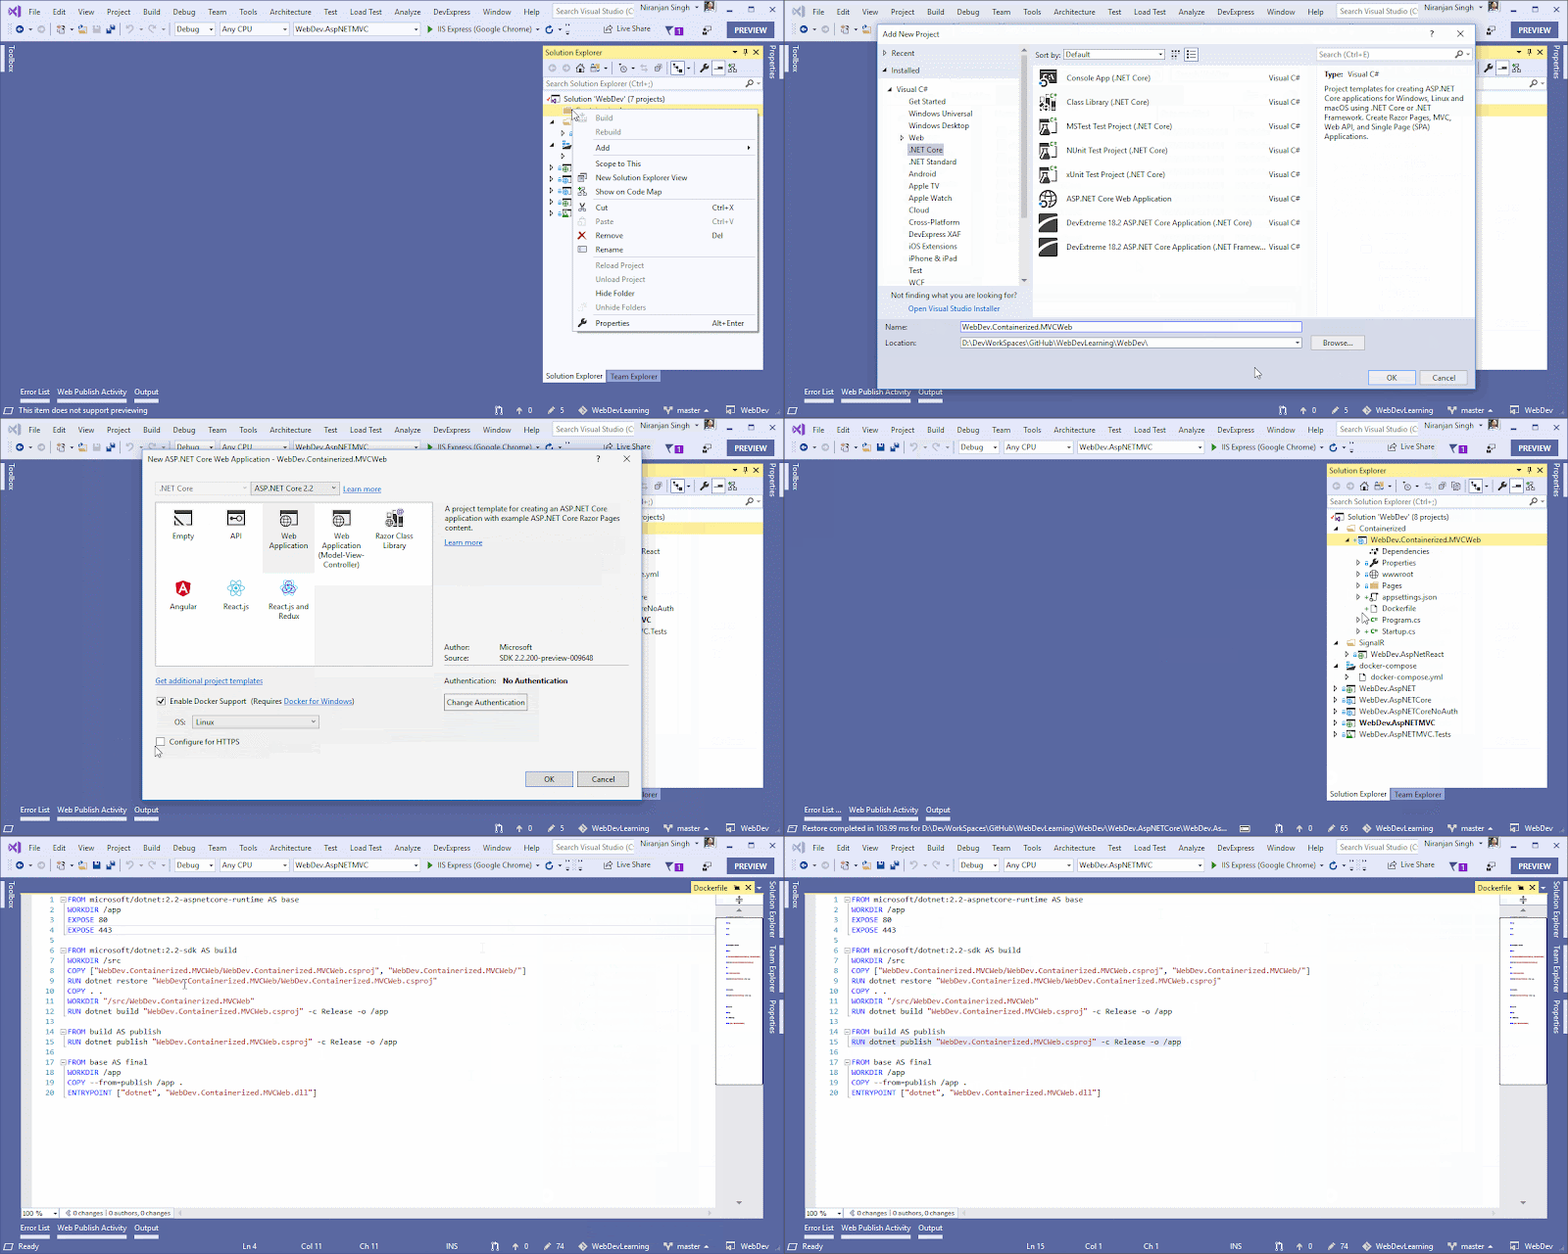
Docker tools in Visual Studio understand the difference between. NET Core and the. NET full framework so the generated files will nicely reflect those different targeted platforms.
To add Docker support for the full framework, go through previous post - Containerizing a .NET application
Enable Docker support in a new application
You add Docker support after creating a project is by right-clicking the project in the “Solution Explorer” and then select “Docker Support” option under the Add submenu.
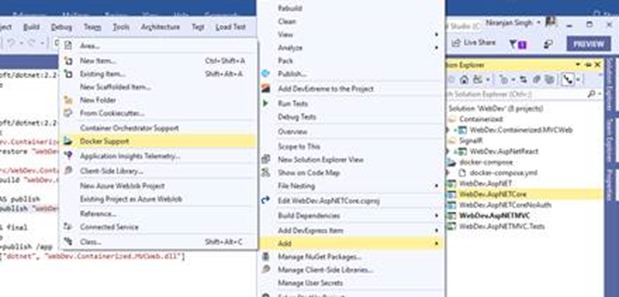
Visual Studio will add DockerFile and .dockerignore to the project that will be used to build a docker container image starts with a reference to the base image dotnet:2.2-aspnetcore-runtime.

Note: To build this container, you need to switch the Docker tools for Windows on your machine to run Linux containers. If it is targeting to different operating system type, then you would get errors during the build since you can't mix Linux containers with Windows containers.
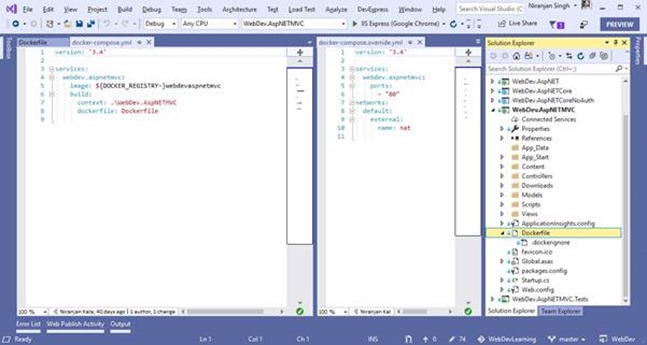
Docker support also added the generated YAML files. YAML files can be used together with docker-compose to execute Docker commands to a set of containers instead of only one at a time so that multiple container can work together for the microservices scenarios.
docker build -f "D:\DevWorkSpaces\GitHub\WebDevLearning\WebDev\WebDev.Containerized.MVCWeb\Dockerfile" -t webdevcontainerizedmvcweb:dev
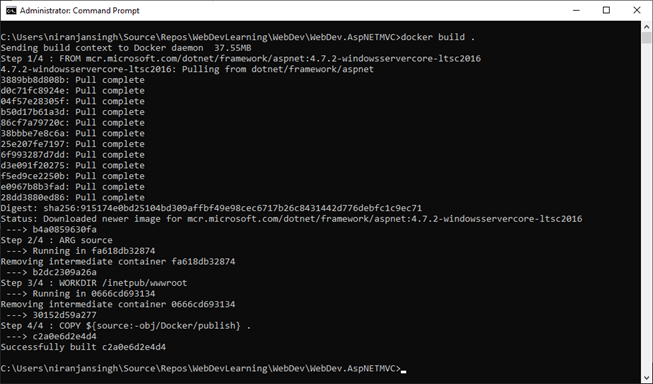
Build Docker image from CLI
Open command prompt in administrative mode and run the below command in project folder:
C:\Users\niranjansingh\Source\Repos\WebDevLearning\WebDev\WebDev.AspNETMVC>docker build .
Running application under Docker Environment
For .NET Core framework applications, Just run the application by selecting the Docker option just after the Run arrow button. After that application will build and create Docker image according to the settings provided in the DockerFile.
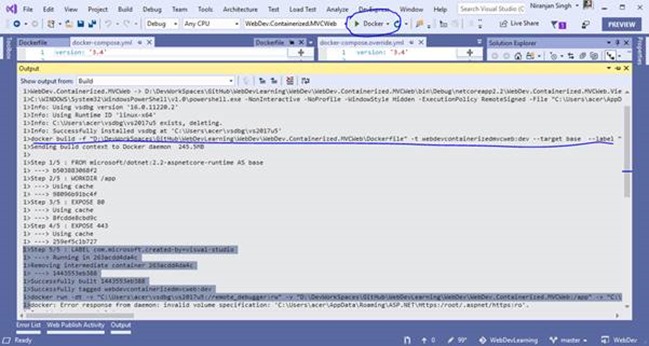
For my case application is targeting “Linux” and Docker for Windows on my system is configured to run the Windows contains so it will not build my case. So, remember to switch particular target Operating system containers before you build the application.
For a .NET framework application, make docker-compose as startup project. After this modify the .yml files to build and run the contains.
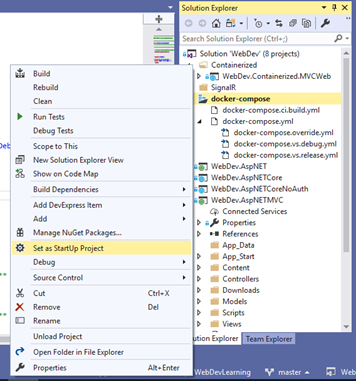
You will see Docker Compose button on the place of “Docker” in .NET full framework applications.

Click on Debug button to let the docker decompose to build and run the docker image on the bases of yml file configuration.